Project Overview


|
The purpose of this project is to learn how Boolean algebra works and how it affects a circuit. But we are using the circuit to show how a majority vote situation would work, with one ultimatum, as long as the president votes with one or more people, that option will always win in the vote.
|
Problem Conception

The un-simplified expression is shown in the picture above. The expression is in Sum of Products, or SOP form. I chose to use SOP form over POS because in my opinion it is easier to use and SOP equation when creating a circuit, and I feel like SOP equations are also easier to find using the truth table.
Un-Simplified Circuit

This circuit is in Bus form, meaning it uses a bus line to avoid a confusing clump of wires at each switch, so that each line doesn't have to be directly connected to the switch it is using. The only gates that are on the left side of the bus are inverters, they are on that side to make the circuit more simple, now you only need one inverter to use for multiple combinations. In order to create this un-simplified circuit you will need 35 gates. Given the amount of gates that we had to use for this circuit it would require 1 inverter chip, 6 AND chips, and 2 OR chips. Which means the circuit would require 9 chips in total.
Boolean Algebra Simplification

Simplified Circuit

This circuit is also in Bus form, although unlike the previous circuit it does not contain any inverters on the left or the right side of the Bus line. This circuit also requires a number less gates than the first circuit did, since it has no inverters, only 5 AND gates, and only 3 OR gates. Since this circuit only requires 5 AND gates and 3 OR gates it will also require less chips. This circuit requires 2 AND chips and 1 OR chip. I was able to figure this out because each AND/OR chip only has 4 gates inside of it.
Majority Vote Circuit Bill of Materials
In order to create the circuit you need to know which materials, and how much of each material they need. Some of the most important components include the breadboard and the breadboard power circuit. Only needing one of each to create the circuit. Then you will need 2 AND chips and 1 OR chip, you will need a large bunch of wires so that you do not run out wires that you need to finish the circuit, and finally you will need set of wire cutters.
Bread-Boarding


|
|
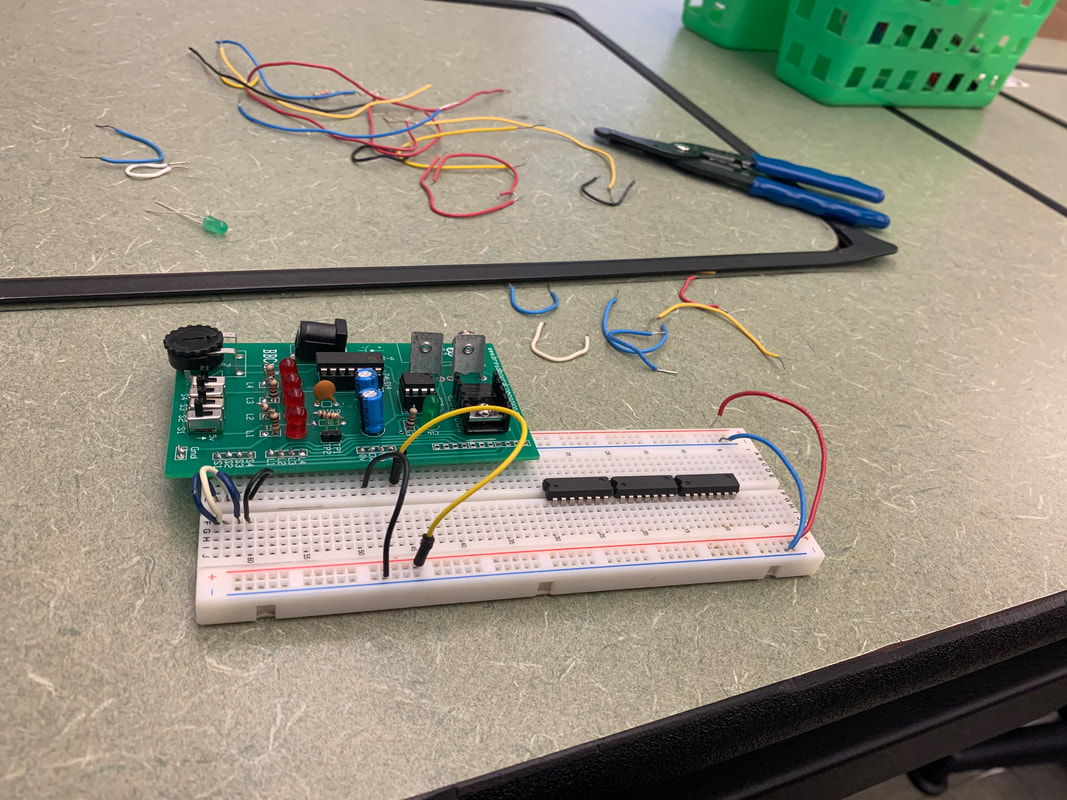
In the picture that is on the top you will see the final stages of my breadboard circuit. While on the bottom right you see my circuit just after I had successfully powered my circuit, and on the bottom left you will see my fully powered circuit including my IC's, and the beginnings of connecting my switches to my LED. My first experience with the breadboard went very well, I finished the circuit very quickly and with relatively little problems. The one mistake that I did make while making the breadboard circuit was during my first time powering the circuit I forgot to connect the circuit across each side of the divide. I learned how to change the length of the wires to better fit the circuit and makes it easier to see what is going on inside the circuit.
Final Project Conclusions
Some of the most important take-aways from this project are things that can help us in future projects, such as the bus line in tinkercad, as well as how to correctly use a breadboard to create a circuit. In order to go from a basic statement to a finished circuit design you must first create a truth table with all of your possible outcomes, and you must find an expression that can either be in SOP or POS form. You will then use Boolean Algebra to simplify the equation and find a shorter and less complex equation that essentially tells you the same thing, you should then test your simplified equation using software that is available to you, such as tinkercad. And you will finally create your circuit using a breadboard. Boolean Algebra is useful because without it you would have no way to simplify your equation and would end up with a very large and complex circuit, that in the real world could cost you a lot of money that didn't have to be spent. In conclusion, this project helped us develop skills that we will need for future projects and may possibly need in the future after highschool.
